InfoQube Program Install and Set-up
InfoQube (IQ) comes in 2 flavors:
- Installable (Win XP and up, Mac, Linux in Windows emulation)
- Portable (Win XP and up)
The portable flavor is identical to the installable one, not a scaled down / limited one. It works in even the most secured / locked down work environments / Internet cafés.
It can run from a USB drive, does not write to the registry or to any local file. It leaves absolutely no traces behind.
The portable flavor is in fact more immune to PC setup, so it will, in some cases, work correctly when the installable will not. These cases are rare though and both flavors generally work correctly.
After reading this page, checkout Settings for best IQ experience
1. Using the Installable flavor
- Uninstall any previous versions (using the control panel Add/Remove Programs)
- Download the InfoQube Installer
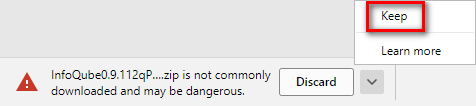
- As InfoQube is updated on a regular basis, using version-specific file names, your browser may issue the warning: "InfoQubexxx is not commonly downloaded and may be dangerous". Click the arrow and select "Keep"
- Unzip to extract the file setup.exe
- (optional) In Windows Explorer, right-click on setup.exe > Properties and check the Unblock checkbox. Click OK
- Run setup.exe. If the file was not unblocked in the previous step, Windows Defender SmarScreen may show a warning that the app may put your PC at risk. Click "More info" and click "Run anyway"
- If upgrading from a previous version, your settings will remain intact
2. Using the Portable flavor
- Download the Portable InfoQube Zip file
- Extract to any non-protected folder (local HD or portable). So do not copy IQ Portable to the Program Files folder !!! (e.g. Use c:\SomeFolder, MyDocuments\SomeFolder, etc)
- If you wish to have a desktop shortcut:
- Right-click on the file InfoQube.exe, select - Send To > Desktop
- You can drag this shortcut to the Quick Launch section of the Windows Start Menu
- If you wish to add it to the Start Menu:
- Right-click on the file InfoQube.exe and select Copy.
- Right-click on the “Start” button and select either “Open” or “Open All Users” Then, open the “Programs” folder.
- Right click on a blank space in the “Programs” folder and select “Paste Shortcut”
- If you receive a security warning when starting or using InfoQube, either select "run anyways" or better still, run the batch file UnblockIQPortable.bat
- When upgrading from a previous version, simply paste the content of the zip file to the previous version folder and overwrite the files. Your settings will remain intact.
Once installed, the following folder structure should be present (folder "InfoQube" may be named differently, depending on where you installed it):
- InfoQube
- AppData
- AppFiles
- Controls
- Icons
- Users
Installing patches
Between versions, patches are sometimes available. To install these:
- Download from the patch (same link as above)
- Since the file is less common, browsers will likely flag it as suspicious. Click Keep (or Open) :
- Locate the main program folder (use Tools > Help > About > Support Info to find the program folder)
- Close IQ if it is running
- Open the zip file (which was most likely saved in your Downloads folder)
- Copy paste the InfoQube.exe file from the zip file to the main program folder
The default database engine is MS JET 4.0. InfoQube also supports using MS ACE 12. To use this newer engine:
- Install the MS 32-bit Access 2010 Runtime from here
- Download the ACE specific patch (may not be as up to date as the regular patch)
- Unzip and overwrite InfoQube.exe as per above
- n.b. In every day uses, there isn't any advantages to using the ACE engine, so most users should stick with the stock one.
It is provided as an option to be used in rare cases where issues are found with the JET
3. Installing Visual C++ 2008 redistributable
Both flavors required that Visual C++ 2008 redistributable package be installed (VC++ 9.0). The VC++ 9.0 runtime is typically already pre-installed on Windows computers, but for older computers it may not be. If not, you'll receive a registration error message (Installable flavor) or a program lockup (Portable flavor).
To fix, download and install the VC9 redist from here: http://www.microsoft.com/en-us/download/details.aspx?id=29
4. Installing the IQ:// URI Protocol
InfoQube has support for universal links (a.k.a URI protocol links) in both direction (from other apps to IQ and from IQ to other apps).
To link to specific IQ items and views, the following key is added to the registry: HKEY_CLASSES_ROOT\IQ
Windows Registry Editor Version 5.00
[HKEY_CLASSES_ROOT\IQ]
@="URL:InfoQube Folders"
"URL Protocol"=""
[HKEY_CLASSES_ROOT\IQ\DefaultIcon]
@="\"C:\\IQAPPFolder\\InfoQubeClipper.exe\""
[HKEY_CLASSES_ROOT\IQ\shell]
@="open"
[HKEY_CLASSES_ROOT\IQ\shell\open]
@=""
[HKEY_CLASSES_ROOT\IQ\shell\open\command]
@="\"C:\\IQAPPFolder\\InfoQubeClipper.exe\" /select %1"
The setup package includes a utility to make these changes automatically. Run IQURIProtocolInstall.exe to install the IQ:// protocol.
5. Installing the Help File
To install a local copy of the Help file, follow these instructions: InfoQube Documentation: Main Page
The local Help file is however outdated. It is recommended to:
- Use online help (this web site)
- Open the Welcome to IQ database (updated with every release)
6. Installing Microsoft Web Components
If you have Microsoft Office installed (2000 - 2003 and up), InfoQube can use its Pivot Tables and Charts. These are great for data analysis and reporting.
2 cases:
- Office 2000, 2002 (XP) or 2003 is installed: The Office Web Components are already installed
- Office 2007 and up: The Office 2003 Web Components can be downloaded here (local copy)
See Pivot Tables and Charts on how to use Pivot Tables and Charts
7. Installing Support Programs
InfoQube can make use of external programs, such as:
- Microsoft Word, BlockNote and WizHTMLEditor to edit MHT documents
- StylusLabs Write to edit Ink documents
- Inkscape to edit drawings (SVG documents)
7.1 Install MHT Editors
- InfoQube lets you use any 2 MHT editors
- To edit an MHT document with these, click on the corresponding button on the toolbar or press the shortcut key (Ctrl + W and Ctrl + Shift + W)
- Download and install any of these free MHT editors and enter the paths in Tools > Options > General > Document pane > MS Word / Alternate MHT Editor:
- BlockNote can be downloaded here and here (local copy)
- WizHTMLEditor can be downloaded here and here (local copy)
- Kingsoft Write Free 2013 can be downloaded here
7.2 Install Ink Document Editor
InfoQube uses StylusLabs Write (free) as its Ink editor. Write is described as a Word processor for handwriting. Its support for ink is outstanding. See Using Ink Documents (handwriting) Using Ink Documents to learn more on the Ink Editor
To install the Ink Editor:
- Download zip file. 2 versions are available: v2.02 (link) and v2.09 (link). v2.09 has a few issues, so it is recommended to use v2.02. Both can be installed at once, in different folders
- Write is a portable App. It is therefore recommended to:
- Create a folder C:\PortableApps
- Create a sub-folder StylusLabsWrite
- Extract the content of the zip file into this folder
- In InfoQube, do Tools > Options > General > Document pane > Ink Editor path. Point to the above path and select Write.exe. Click OK
- Write is also available as an installable program, so instead of steps 1 and 2 above, you can download and install the setup available here. It is however the most recent version, which has a issue with the "single file" mode. So this is not the recommended approach
- To view Ink documents, the Document pane must be using IE 9 or above (see Program Settings and options 10. Program Settings and options)
Configuring the Ink Editor
To configure Write, start the program and click on the 3 vertical dots on the right of the window and select Preferences. Select "Show advanced preferences". The dialog will now show the following sections:
- Input
- User Interface: see below
- Document List
- General
- Ruled Tools
- Performance
- Advanced
Recommended settings if you have an active pen are:
- Input: Mouse Input=Pan, Single-touch=Ignore, Multi-touch=Pan, Smoothing=10
- User Interface: Return to previous tool: uncheck
Click on Edit Toolbar and drag-drop icons to customize the Toolbar, typically adding:- Save
- Create Link
- Full Screen
- Pan
- Pen Color
- Create Whiteboard and Open Whiteboard (if you plan to use the new real-time collaboration on Ink documents)
- Document List: Uncheck Prompt before saving and Reopen last
- General: Check all except Auto grow page right and Display time range. Set View mode=Vertical scrolling
- Rules Tools: Check all. Column detection=Normal. Minimum reflow=0.30
- Performance:
- Advanced: Check all except Check for updates. Set File extension=shtml
Additional settings
- Write defaults to saving files with images down sampled (to reduce file size). So if you later on increase the image size, you'll notice significant image quality degradation.
You can change this by adding this setting in the Write.xml config file: <int name="savePicScaled" value="0" />.
The file is typically located in c:\users\YourUserName\AppData\Roaming\Stylus Labs - The toolbar customize UI is missing Zoom In/Out commands. These can nevertheless be added by editing the Write.xml file: In the toolbar section, add actionZoom_In and actionZoom_Out
7.3 Install Inkscape (SVG document editor)
- Inkscape latest version can be downloaded here (official site)
- In InfoQube, do Tools > Options > General > Document pane > SVG Editor path. Point to the above path and select Inkscape.exe. Click OK
- To view SVG documents, the Document pane must be using IE 9 or above (see Program Settings and options 10. Program Settings and options)
7.4 Viewing PDF files
To display PDFs in the Document pane, Adobe Acrobat Reader must be installed. Version X 10.1.4 or 10.1.16 works fine. Steps are:
- Download Acrobat Reader X from here
- Install it
- Open Acrobat Reader
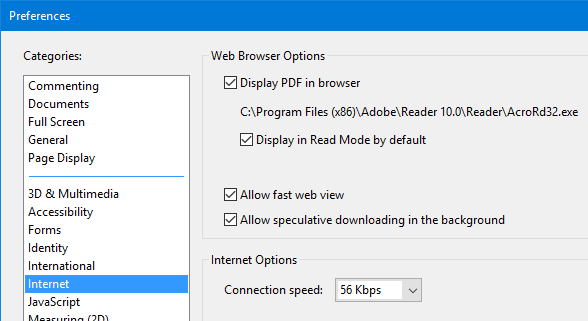
- Edit > Preferences > Internet: Check Display PDF in browser (should be checked by default):
- Edit > Preferences > Reading: In Screen Reader Options > Page vs Document, select Only read the currently visible page (Ref link)
- On recent Windows 10 OS versions, this version of Acrobat Reader will crash after a few seconds. If this happens, click on the Adobe Update icon on the taskbar and install the recommended update
- When in IQ, if showing PDF documents brings up a dialog about Reading Order every time, close IQ and open the file in Acrobat Reader. Select the above reading options and check to save this setting:

InfoQube is also compatible with more recent versions of Acrobat Reader (such as version DC). For such versions, the setting to view PDF documents in browsers is with Internet Explorer:
- Open Internet Explorer
- Choose Tools > Manage Add-ons
- In the list of add-ons, select Adobe PDF Reader
- Click the Enable button
- Additional info here: https://helpx.adobe.com/acrobat/using/display-pdf-in-browser.html
It is also possible to use Foxit PDF Reader instead of Acrobat. Download it here.
8. Installing the Extensions
Whether you're using the installable or portable flavors, you may want to install the extensions. These allow 1-click clipping into IQ.
If you choose not to install the extensions, the Universal Clipper can still be used to clip content into IQ. See Clipping Content from other Apps 1. Clipping Content from other Apps for details
8.1 Install the Internet Explorer Extension
- Close all instances of IE
- In Windows Explorer, double-click on the file InfoQubeIEExtensionInstall.exe. The file is in the same folder as the main InfoQube executable (InfoQube.exe). Alternatively, it can be downloaded here (unzip downloaded file and place content in the IQ folder).
- Click Yes to confirm modification to the registry (you'll need admin priviledges to do this).
8.2 Install the Firefox Extension
- Open Firefox (up to v56. Clipper is incompatible with v57+)
- Navigate to this page: https://addons.mozilla.org/fr/firefox/addon/infoqube-firefox-extension/
- Click Install.
- Click on Restart Firefox
8.3 Install the Thunderbird Extension
- In Thunderbird, Tools > Add-ons and browse to the file InfoQubeTBExtension.xpi. The file is in the same folder as the InfoQube program
9. Registry Settings
IQ comes with a few registry tweaks files:
- EMLRegistryFix.reg: Use this if EML files are not displayed correctly in the Document pane.
- OutlookProtocol2007.reg, OutlookProtocol2010.reg, OutlookProtocol2013.reg, OutlookProtocol2016.reg: Use this if hyperlinks using the Outlook protocol do not work (Outlook:UUID).
See this reference on how to tune this depending on the exact version of Outlook
To apply these: Right-click on this file and select Run as Administrator.
10. Copying user settings and IQ configuration files
Whether installing onto a new drive/folder (USB or other) or moving from Installable to Portable flavors, users will want to move their settings with them. All settings are saved in the following folder:
- Installable:
- C:\Documents and settings\YourUserName\Application Data\InfoQube (XP)
- C:\Users\YourUserName\AppData\Roaming\InfoQube (Vista and up)
- Portable: Your IQ folder\Users\YourUserName
This folder contains the following files:
| File | Description |
| Dock.dat | Configuration of the docked panels |
| HomePage.htm | IQ's HomePage |
| HTMLClipperTemplate.HTM | Used by content clippers. Details here Configuring the Clipping Footer |
| Menu.dat | Your customization of the main menu |
| MenuHTML.dat | Your customization of the Document pane menu |
| NewHTML.htm | Default template for new HTML documents |
| NewInk.slink | Default template for new Ink documents |
| NewMHT.mht | Default template for new MHT documents |
| NewSVG.svg | Default template for new SVG documents |
| Options.ini | IQ options (Tools>>Options>>Program Settings) |
| Settings.ini | Window sizes, Dialog settings and values, etc |
| User.vb | User specific VBScript code: View>>Visual Basic Editor>>User Code |
You may choose to copy all or only certain of these files