Customizing Menus and Toolbars
All menus and toolbars can be customized. This can be done in a number of ways.
(the menu system is a clone of what was used for Microsoft Office 2003, so the same tips and tricks apply)
There are two distinct menu / toolbar sets. One for the main InfoQube window, one for the Document pane. Commands cannot be move from one to the other.
1. Moving Menus and Toolbar
All menus and toolbar can be moved and un-docked (i.e. floating).
To move a menu / toolbar, move the mouse to the left side of it, the cursor will change ( 4 arrows ). Click and drag to move it or undock it. Once undocked, you can dock it to any of the 4 sides of the IQ main window
2. Show / Hide Toolbars
To show / hide a toolbar, right-click on any menu / toolbar to show the list of toolbars. Select which ones you want to have visible:

3. Add, Remove, Move Commands from Menus and Toolbars
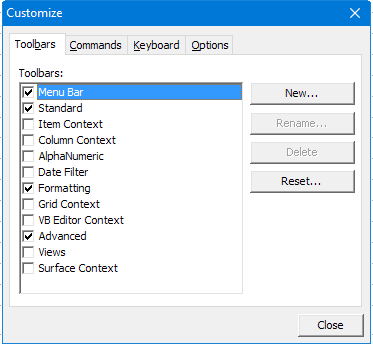
Right-click on a menu / toolbar and select Customize. The Customize dialog will open:
In Customize mode, it is easy to make changes to menus and toolbars:
- Click on any command button and move it to another location on the same menu / toolbar or to another one
- Move any command button just slightly to the right (or down) to add a separator bar
- Drag a command to an empty space to remove it from the menu / toolbar
- To create a copy of the command, hold the Ctrl key while moving. This is often the easiest way to add commands to toolbars
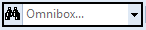
- Text entry commands (such as the Omnibox) can be resized. Click the command, a black box will be shown around it. Press Ctrl and click on the right side to resize it
- Press the Escape key to cancel the drag-drop operation (while still pressing the left mouse button)
- Select any command from the Commands tab and drag it to a toolbar / menu (see below)
3.1 Toolbars Tab
In the Toolbars tab, you can:
- Show / hide toolbars
- Reset a toolbar: If you've modified a toolbar, this will reset it to the default one. This is sometimes required when new features are added
- Create a new empty toolbar. As the standard toolbars may be changed with every new release, it is sometimes useful to create your own.
3.2 Commands Tab
Holding the Ctrl key while moving a command is an easy way to create a new command button.
Another way is using the Commands tab. It lists all (actually nearly all) commands, by category:
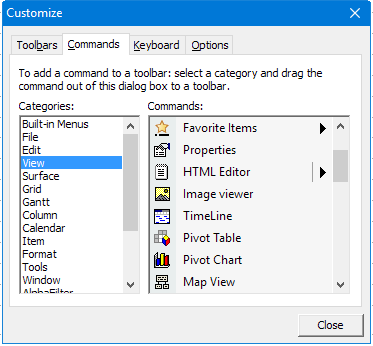
Drag-drop any command to a menu / toolbar to add it.
3.3. Keyboard Tab
Nearly all commands can be assigned a keyboard shortcut. See Keyboard Shortcuts for details
Click on the Keyboard tab to manage shortcuts:

Notes:
- If a shortcut is not working, most likely the same shortcut was assigned to something else. Use View All Shortcuts to find what it is assigned to.
- There are 2 menu systems in IQ. The main one and the one for the HTML editing pane. Each are customized separately.
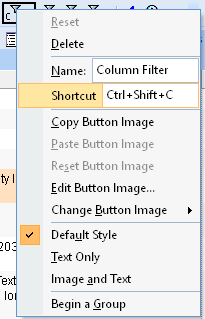
- Some commands don't show in this dialog (split buttons for example). To assign a shortcut to these, right-click directly on the button and enter the shortcut there. Use Shift+Ctrl+C for example:
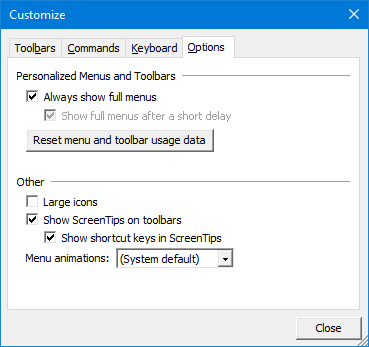
3.4. Options Tab
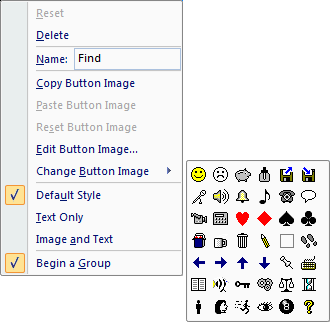
3.5 Modifying an existing command
Right-click on any existing command button will show a context menu to allow changes to be made: