Delimited Text files (Excel, Access, Outlook, etc.)
Many applications including Excel and Access, can export data as text files. Two most common formats are:
- Comma separated values, or CSV
- Tab-delimited
InfoQube can import these formats. To import, do File > Import from > Non-Hierarchical Data
In this sample, we'll import an IQ language file. The easiest way to nicely view this data, is to create a new grid:
- View > Grids > New grid
- We'll give it the name IQStrings
- Click OK.
- The new grid is created and opened
- A new yes/no field, called IQStrings, is also created, to hold the data we'll enter in this grid
Import Step 1: Select / edit the data
Click on File > Import from > Non-Hierarchical Data to bring up the import dialog box.
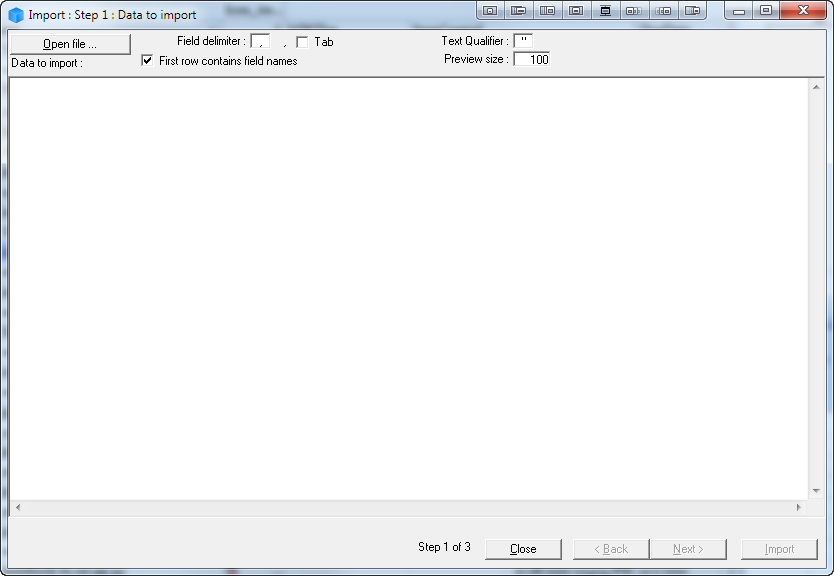
In step 1:
- Click on Open File and select a file (no file size limit), or
- Paste the content to import in the text area (max file size=64kB)
- Select the delimiter (normally "," for CSV) or check Tab for Tab-delimited
- Check as to whether the first line contains the field names or not
- You can examine the file content and do minor edits if required
- Click on "Next"
Import Step 2: Field Mapping

In step 2, the dialog is divided into 2 sections;
- In the top section, a grid shows the data after it has been parsed. You can scroll to ensure it was done correctly. If now, click the Back button to return to step 1
- In the bottom section, you determine the field parsing (between the data to import and the current database)
To do step 2, you:
- First check in the top section, that the file parsing was done correctly
- If the first line contains the field names, these will be shown in the bottom section, if not, these will be given numbers (matching those of the top section)
- For each field that you want imported, select (in the second column) the appropriate IQ Field
- If the IQ Field does not exist, you can create it. Since the import dialog is not modal, you can do Tools > Manage Fields and create your fields
- Click Refresh Field List if new fields were added
- You can also set fixed values (not in the original import file), to help categorize the new data. In this example, 2 IQ Fields were set
- Language was set to En (as these strings were in that language)
- IQStrings was set to -1. IQStrings is the yes/no field related to the grid we created earlier. To set it, assign it the value -1. That way, the IQStrings grid will display the imported data
- You can save this field mapping to a file, load an existing field mapping file
- You can also select which records to import (you may want to first do a test with a few records, or import them by batches of 100, etc)
- Click Next
Import Step 3: Import
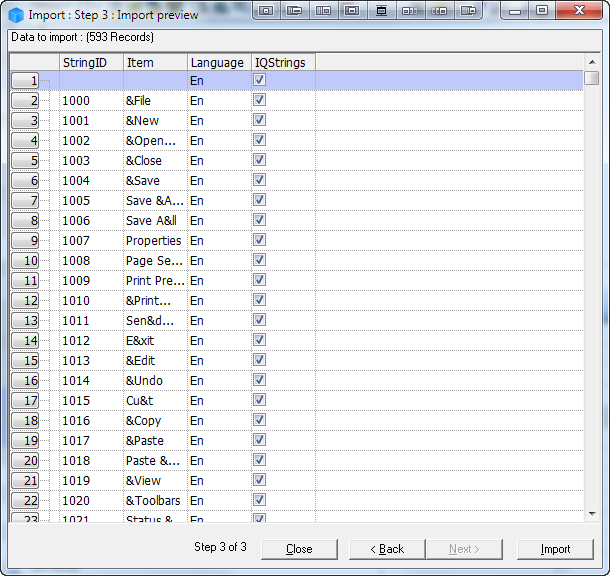
Step 3 is the final step:
- You'll see a preview of the data to import and into which IQ Field.
- Click Import to complete the process or Back to return to a previous step.
- The staus bar will show the import progress and a dialog will tell you the number of imported items
- Click Close
You can now open your IQStrings grid and add the imported fields:
