Grid Display Modes
InfoQube has many display modes to help you manage your information in the most efficient manner
Grids can display items using one of 4 modes:
- Outline (Normal)
Shows the outline (or hierarchy) of items and sub-items.
If a parent item does not meet the grid source, it can still be shown (for context) if Grid > Context Parents is set
- Document (Reading mode)
Show the same content as Outline (Normal) above but with a different presentation
- Source items (Flat List)
Sometimes the hierarchy gets in the way. For example when sorting items. A flat list is then very useful.
Only items meeting the grid source (i.e. source, filter, etc.) are shown. If items have sub-items, a + expand button is shown.
- Source items (Tree View)
This somewhat hybrid view shows the same list of items as the flat list, but arranged in a hierarchy whenever possible.
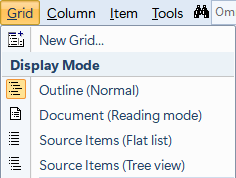
To set the grid display mode use one of:
- Grid menu > Display Mode section,
- Use the dropdown button on the standard toolbar:
The dropdown button icon shows the currently selected display mode
In addition, for each mode, context parents can be shown or not, making a total of 6 displays. We'll look at these and their typical use-case.
The sample IQBase has the following items in grids AdrsBook and Calls. To see the various display modes in action, do:
- File > New > New IQBase with sample data
- Save the file to a non-protected folder, such as the Documents folder
- Open the AdrsBook grid (View > Grids > AdrsBook)
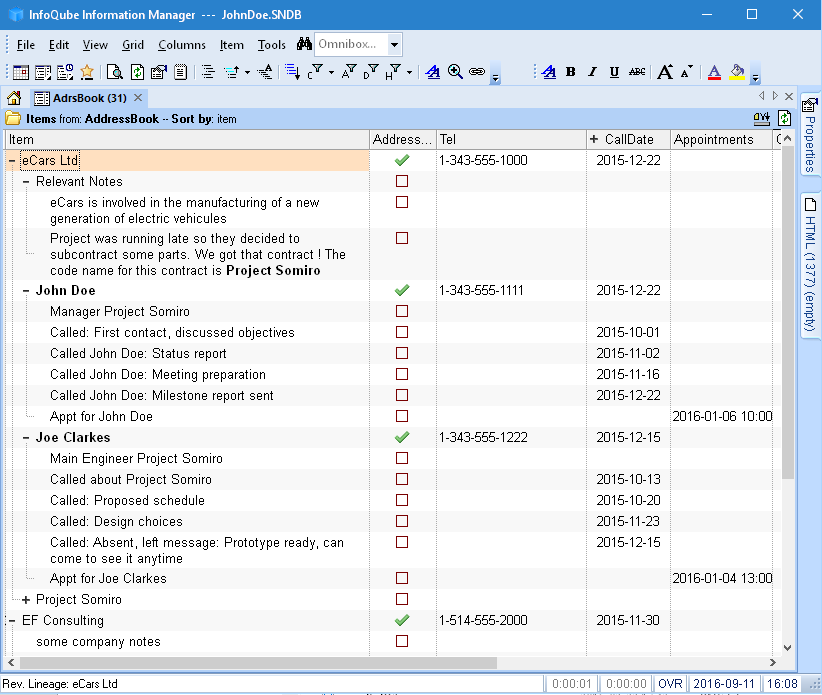
Consider the following items shown in the AdrsBook grid in Outline mode:
Notice that eCars AND some sub-items of it have the AddressBook field checked (second column). This is central to understanding the usefulness of the different display modes
1. Outline (Normal) View
As its name says, this view shows the outline structure (parent - child). The grid source (in this case the AdressBook field) sets what main items are displayed, but then enforces the outline structure. In the above example, John Doe and Joe Clarkes have AdressBook checked but are NOT shown as top level item because their parent (eCars Ltd) also has AdressBook checked. In other words, in Outline mode, the outline "wins" !
2. Document (Reading mode) View
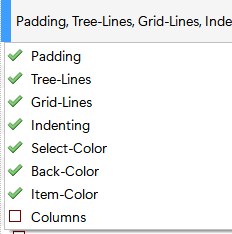
Other views have a "grid" look: rows, lines, columns, etc. In Document view, users can opt to remove some grid properties so the document looks more like a word processor document, while keeping all the "grid" properties.
To choose what property can be removed, use Tools > Options > Program > Grid > Document mode overrides (1.2.24). The available properties are: Padding, Tree lines, Grid lines, Indenting, Item select color, Back color, Item color, Columns:
3. Source Items (Flat List) View
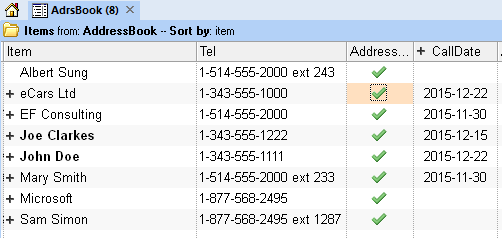
When viewing your address book, you sometimes want to see just your contacts. It is easier to find a contact if other information is hidden (calls, meetings, notes, etc).
To view just contacts, select Flat list. All contacts will be shown as top level items, even if they are at a different level in the Outline view. Notice for example how Albert Sung is now shown at the same level as other contacts.
4. Source Item (Tree View)
When dealing with lots of contact, or when working with many organisations, it can be useful to arrange contacts in hierarchy with companies as top level item (TLI) and its employees as sub-items.
The flat view hides this hierarchy. To view the contact hierarchy, use the Tree View:
Context Parents
Let's now open another grid, which will show mostly the same items but from a different perspective.
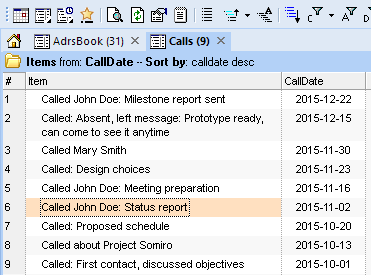
The Calls grid is using CallDate as its source (see the screenshot below: "Items from CallDate").
As seen on the first sample screenshot, the CallDate field has a hierarchy equation and shows the most recent call to a given person and company. This is convenient for
CRM type applications.
Assuming that CallDate did not have this equation, it would be more difficult to quickly see the call history and know when to call back, etc. This is an example where context parents can be useful.
So if you remove the hierarchy equation for CallDate and delete the parent's values, one would be left with CallDates for just the actual calls
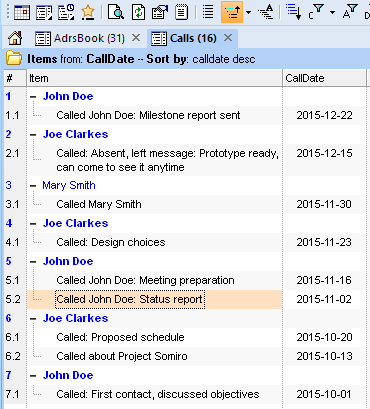
Shown below is the Calls grid, in Flat View (which shows all items that have a CallDate value):
This list is perfectly sorted, showing most recent calls first. What is missing is context information, that is "Who was called". To show this, the ItemParent field could be added in the grid. The information is also available in the
Properties Pane. Alternatively, one can show Context Parents:
In this view (Flat View with Context Parents), the list is still perfectly sorted (CallDate, decending) but with the immediate parent shown (Up to 9 levels of context parents can be shown).
Notice that because of the sort, the same contact is shown more than once (e.g. John Doe is shown three times).
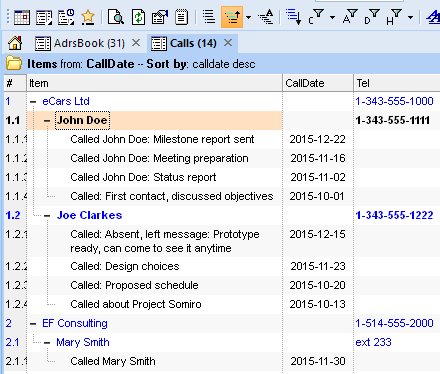
When actually calling John Doe, it would certainly be more convenient to see the calls to that person grouped together, such as shown here:
In this view (Tree View with Context Parents), calls to each person is still shown in the right order (most recent first), but grouped by person. The person's phone number is shown to speed things up ! Multi-level Context parents are also shown since sometimes only the phone extension is entered, so having the company main number is handy (e.g. see Mary Smith).
Each view is complementary and aims at helping you be more efficient at managing your information !
Notes:
- Context parent displays the main parent. If an item has multiple parents, other parents can be viewed in the properties pane (and a single-click on a parent will display it in the Scratch grid).
The main parent is changeable in the properties pane by right clicking on a another parent (if available, in the parents section) and selecting "Set as main parent".
If you change an item's parent, the changes won't be reflected in grids and other outline UIs. Press F5 to refresh the display
- The Context parent is a dropdown. Choose between (none) and 9 level deep. Setting to 1 shows only the immediate parent for example
- To view sub-items which may be hidden use: Item > Show all sub-items (or Ctrl + Click on the outline/hierarchy bullet in the grid)
Grid settings may hide "non-relevant" sub-items, such as those not meeting filter criteria (items marked done for example)