Outline Styles
REMINDER |
|
Outline Styles and Labels provides a quick way to automatically format your outlines.
With Outline Styles, the font face, size, bold, underline, color, etc are automatically set based on the item hierarchy level (i.e. heading level) and any change in the hierarchy is immediately updated:
Combined with Outline Labels, this provides great visual feedback when writing many types of documents.
1- Managing Styles
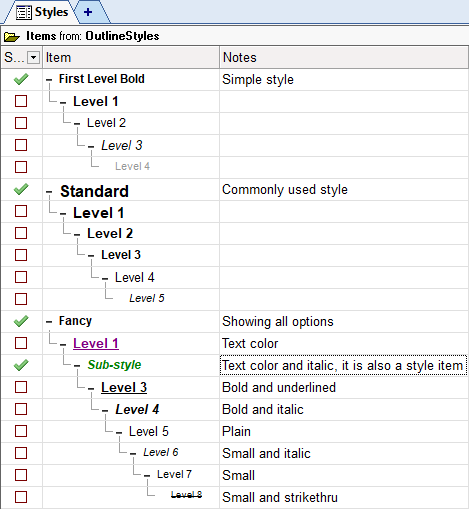
Styles are just regular items with the field OutlineStyles checked.
To manage styles, the simplest way is to create a grid with OutlineStyles as its source:
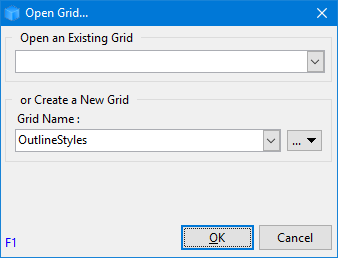
- The OutlineStyles grid can be renamed Styles if desired. IQ will search for either of these grids to manage styles
If such a grid does not exist, it will open the Scratch grid and show the style items. - To create styles, create a hierarchy of items
- The first level is the style name
- For other levels, the actual item text is not used. Using Level x is a good choice
- Use the formatting toolbar to format each level
- All item level formatting are allowed:
- Font face and size
- Bold, italic, underline, strikethrough attributes
- Text foreground color
- Item background color
- Using Copy / Paste, one can transfer styles from one IQBase to another
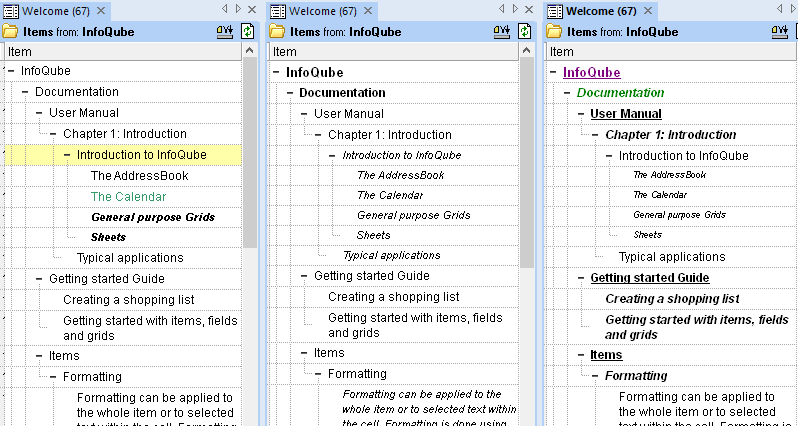
In this example, 3 styles are defined: First Level Bold, Standard and Fancy.
2- Using Styles
Using styles is quite simple:
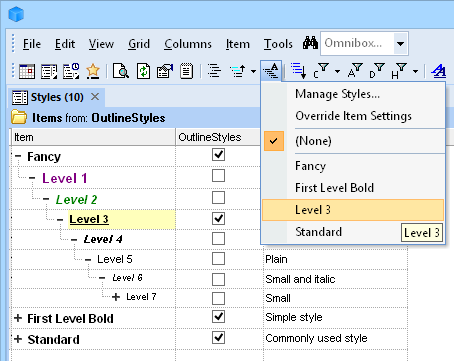
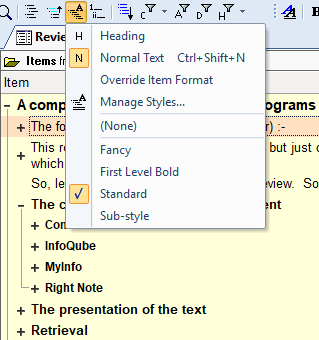
- Use Grid > Outline Style menu (or toolbar dropdown button) to select the style or "(none)"
- Override Item Settings allows to choose from:
- Checked: Outline style is applied to all items. Grid and Item formatting are completely ignored.
- Unchecked: item format merges grid, item and style formats
2.1 Heading vs Normal Items
When using InfoQube as a writing tool, it is important to distinguish between Headings and paragraphs (i.e. actual content):
- Use the H or N command buttons to toggle between the two states
(an item is either a heading or a normal text item, never both) - By default, all items are Headings
- Adding an item after a paragraph (normal item) creates a new paragraph
How Heading / Normal items affect Outline Styles
- The rule is very simple: Only Heading items get outline styles
- More details here: 2. Export Outlines (Print-ready)
3- Samples
Using such styles it is possible to switch between these 3 views in seconds !
(left: no style, middle: Standard, right: Fancy)
Notes :
- Override Item Settings is useful to hide item specific formatting. Useful when printing or sending the outline to a colleague.
- When using Outline styles, Zoom in / out may not do anything (if the style specifies the font size).
Also, item formatting is possible, however if Override Item Settings is checked, the grid will not show the item format of course.
- To properly manage styles, avoid applying an outline style to the OutlineStyles grid !
- After changes to a style, switch to the grid which uses it and either (1) re-apply the style or (2) press F5 to refresh.
- The same item hierarchy can generate more than one style.
In the above example, if under the Fancy style, the Level 3 item has OutlineStyles field checked, it will also appear in the menu, and it's sub-items will be used (rename it to something more meaningful if desired)